Perhaps the first way you will want to edit the parameters of the application is through the On-screen Menu. It is a good place to start because you can observe the changes in real time and learn the program. In this article you will find an overview of the available options. For a detailed description of each parameter, go to the next sections.
Controls
The menu will appear on your screen after you press ‘Tab‘.
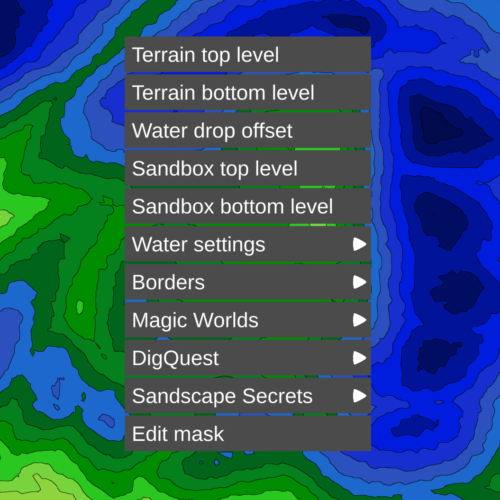
Use the mouse and arrows to navigate the menu. Click a tab with your mouse to edit the parameter. Some of the tabs will take you to a different submenu. Once you have opened a section, you can press ‘Esc‘ to go back one step. When editing a value within a tab, you can also use arrows.

General settings
The first few tabs contain parameters that are defined by default in the GlobalSettings file. This means that if you change the values and close the application (which will save your changes), you will be editing the GlobalSettings and thus any other preset or mode that uses the global values.
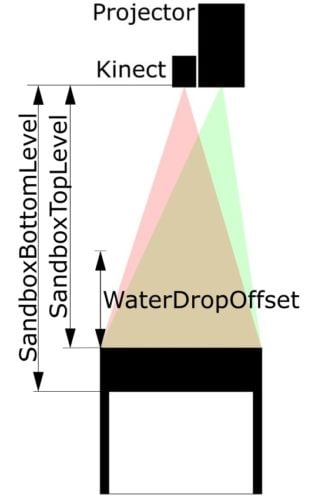
It is recommended that you start with the Sandbox Level tabs. The Top and Bottom Levels describe the physical distances between the Kinect sensor and the sandbox, set in millimeters. It is best to set these at the very beginning as they can cause glitches and bugs in the simulation if the values are wrong. Also, make sure to leave at least 50 [mm] for both parameters (measured 1200mm, set 1250mm).
Although the Water Drop Offset parameter only affects the Interactive Map mode, we’ll explain it now because it’s strictly related to the Sandbox Top Level. It describes the distance between the said sandbox level and the height at which the water flow is activated. The offset value is expressed in millimeters. The higher the number, the higher you have to raise your hand above the sandbox to activate waterflow. It also reduces the interaction area, as the sensor’s field of view narrows upwards.
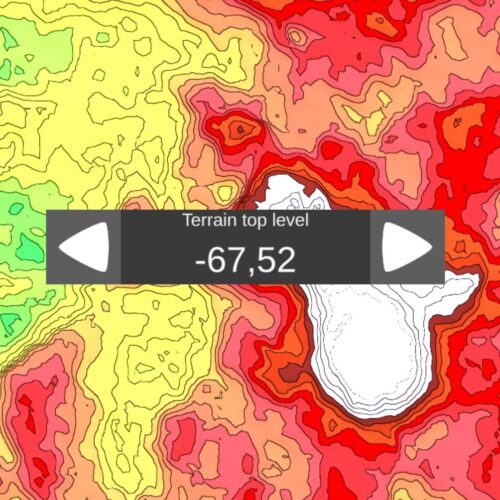
Two tabs at the top of the menu called Terrain Levels refer to the projected height of the terrain in your sandbox. In other words, they determine the height at which the projection starts and stops. When changing values, focus more on what’s happening in your sandbox than on the values themselves. Keep in mind that changing the Top Level, for example, will affect the upper parts of the sand, although some changes may be visible in the lower regions as well. If the projector in your setup only shows a black screen, it may be because the Bottom Level value is way above the actual sand. Refer to the image below to correct this. This setting works similarly in Interactive Map, Magic Worlds, and Sandscape Secrets modes.
Important: The global values for this setting (default option) may give different results in other modes. To work around this, set ‘UseGlobal’ to false in the settings files you want to change.

Borders of the simulation may be a hard concept to grasp, but they will become understandable as you use them. Just start with whatever border you want and change the value in both directions until you see the image moving. It should look like you are moving a curtain over the light beam. Adjust the border so that the “curtain” is directly over the edge of the projected image and no light goes outside the sandbox. Repeat for all four borders. It is important not to set the border too far from the edge, as this also limits the sensor input. Setting it correctly will ensure that the sandbox works without interference from the surrounding area.
Important: The global values for this setting (default option) may give different results in other modes. To work around this, set ‘UseGlobal’ to false in the settings files you want to change.

The last parameter common to all modules is located in the last tab, Edit Mask. After entering this tab, the screen will quickly change and start to look like this:
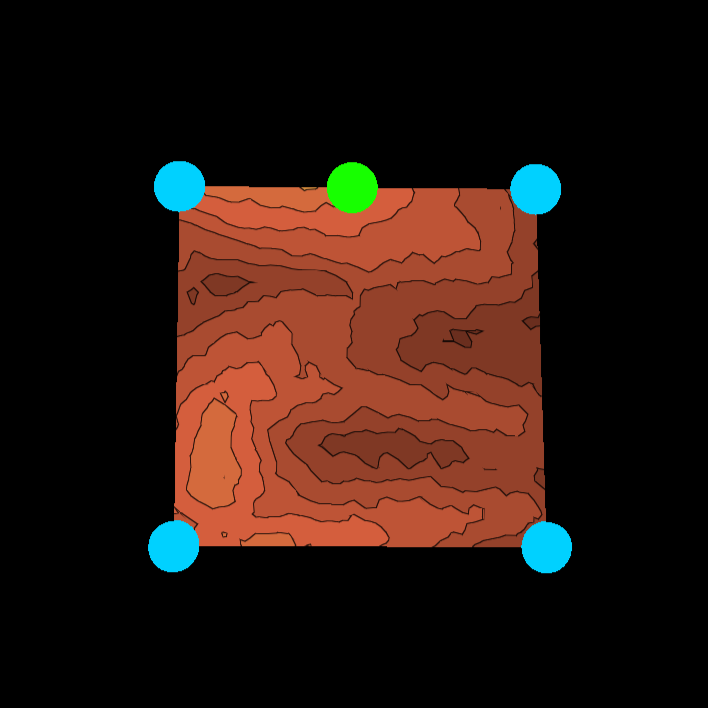
You can use the mask to further refine the borders you set in the step above. If your sandbox has an irregular shape, simply move the cursor over the edge of the image. You should see a green dot. When you click on it, it will turn into another blue node that you can use to cut off the projection. To remove a node, hold down ‘Ctrl‘ and click on it.
Interactive Map
Aside from the Water Drop Offset, the only other tab assigned to the Interactive Map is the Water Settings tab. It contains three parameters that determine how the simulated water behaves.
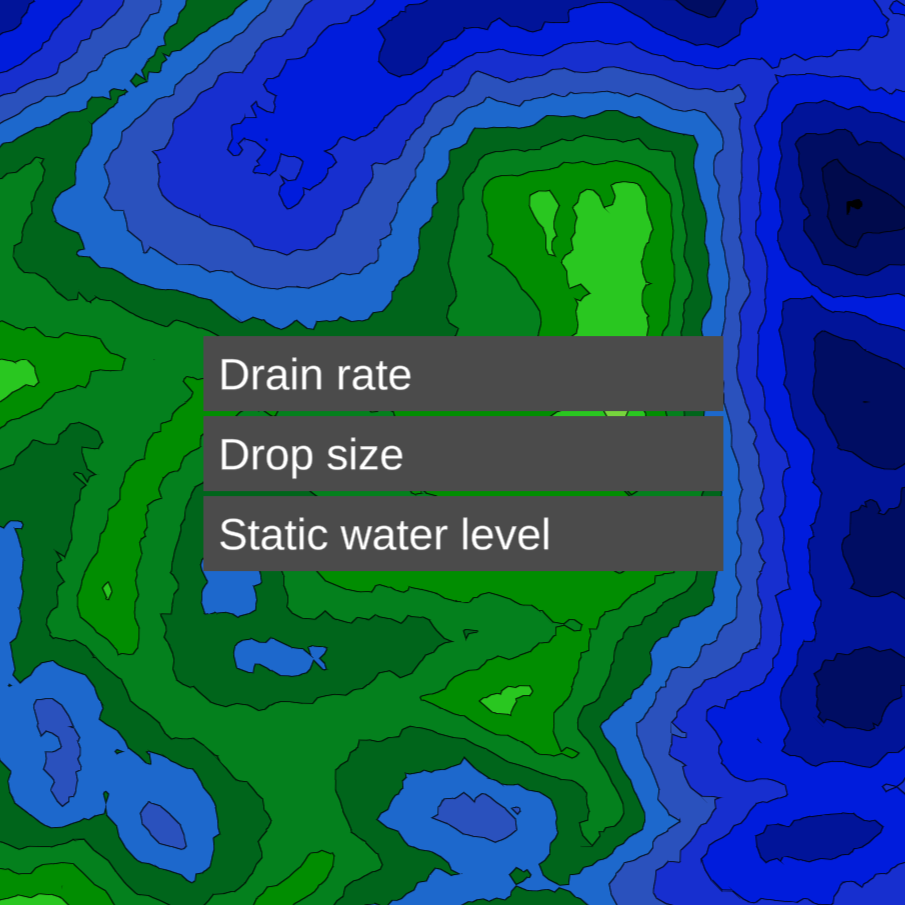
The Drain Rate is the rate at which the water sinks into the ground on its own. The default value is 0, so there is no sinking. Wave your hand to cause some precipitation, then tinker with the parameter and watch the results.
The Drop Size is the amount of water that appears in response to a hand. Again, adjust this to your liking by changing the value and waving your hand.
The last parameter describes a level at which the water will settle after a flood. The Drain Rate must be 0 for this setting to work properly. Press Q to flood and wait for the water to settle. If you do not see any structures appearing after about 15 seconds, it means that the Static Water Level is too high. Setting this parameter correctly is again a trial and error process. Don’t forget to close the application before switching to another preset or mode, otherwise your changes will be lost.
Magic Worlds
The tabs for specific modes are labeled accordingly. The one for Magic Worlds contains a lot of parameters, most of which are pretty self-explanatory.
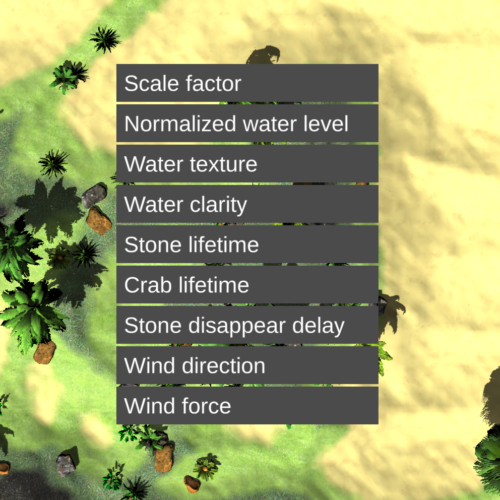
The Scale Factor obviously refers to the size of animals and plants. To observe changes, you have to move the sand. Water and Wind settings are easy to observe in the sandbox. The Crab and Stone settings refer to a mini-game within the mode. In order for it to be active, it must first be turned on in the corresponding settings file.
For more information on each parameter, see the Preset/Mode Settings section.
DigQuest
The DigQuest section allows you to change two parameters. If you are using a single screen setup, ignore this part.

Model Depth describes how deep the model is placed in the sand, and Cover Offset dictates how much sand you have to cover the model with after each game to activate digging. The second parameter is linked to the first, so you don’t have to change it again if you change the depth.
Sandscape Secrets
The parameters found here are crucial for the mode to work properly.
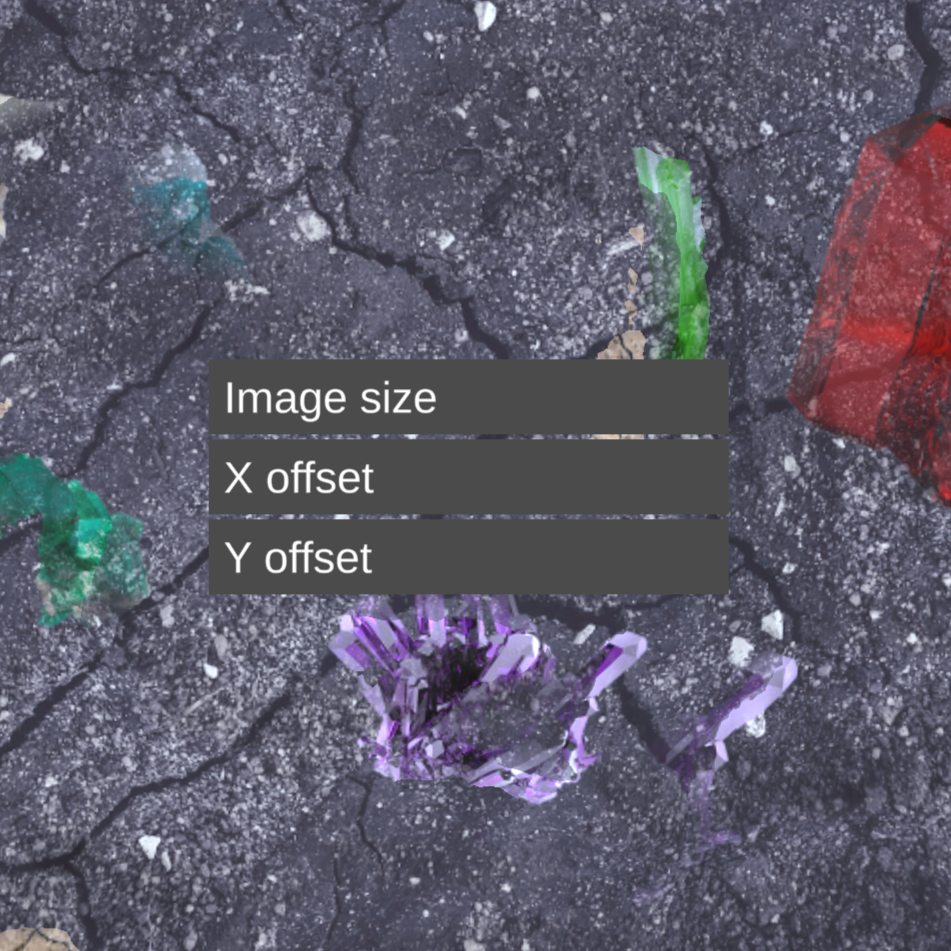
First, use the Image Size setting to zoom in on the image until you can see it clearly. Next, manipulate the X and Y offsets so that the image is centered in the sandbox. From here, you can tweak the scale and offsets until the image is perfectly aligned.